Configuration
The OXID eShop personalisation option requires some settings that affect the display of the recommended products in the shop. In addition, the products for the preparation and display of the recommendations need to be exported from the shop and transferred to econda as a product feed in .csv format. econda Analytics and Tag Manager were activated in the shop, and the necessary files added to the shop.
The settings can be configured in the Admin panel under .
General tab
In order to establish a connection between your OXID eShop and econda, you will need the ID of the econda account. These can be found in the econda Cross Sell Dashboard when you view your account details. Enter this letter-number combination in the field ID of the econda account.

The econda recommendation widgets are integrated into the start page, the category view, the product details page and the thank-you page at the end of the ordering process in your OXID eShop. They can display products from the econda demo shop. For example, if your products have not yet been exported, the presentation can be tested in the recommendation widgets. To do this, check the box Use products from the econda demo shop.
Analytics tab
econda Cross Sell recommendations are based, among other things, on the behaviour of your online shop visitors. Analysing this visitor behaviour requires information which is provided by econda Analytics.
To activate econda Analytics in your OXID eShop, you will need to integrate the Analytics JS library into the shop. Clicking on Browse… opens a file dialog where you can select the file provided by econda on your computer. Click on Open to have the file name applied directly, and then click on Upload to have the file transferred to the shop.
Enable econda Analytics by checking the corresponding box.
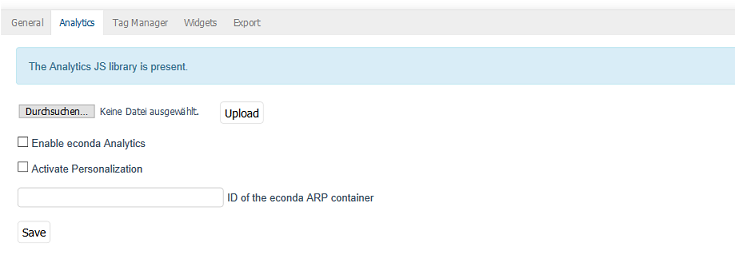
The first time a customer accesses the shop, a data privacy banner can be displayed. This informs the customer that the site tracks the usage behaviour and the information is stored in a small text file (cookie) on the user’s computer.
Personalization, meaning the handling of personal data in accordance with data protection regulations, must be activated. The details of the data privacy banner and opt-ins/opt-outs are defined on the Audience Relationship Platform (ARP) of econda. For the configuration the shop owner receives is supported by the econda consultants. The configuration concerns the consents to be obtained by the customer and his consent for the exchange of data with third parties. All changes made on the Audience Relationship Platform are immediately active in the shop and can be tested there directly.
The synchronization between econda and the shop is based on an ID which must be entered in ID of the econda ARP container.
Tag Manager tab
The econda Tag Manager allows you to define pixels and code scripts and to set rules and variables for their application. These tags are defined via an econda user interface with code check function.
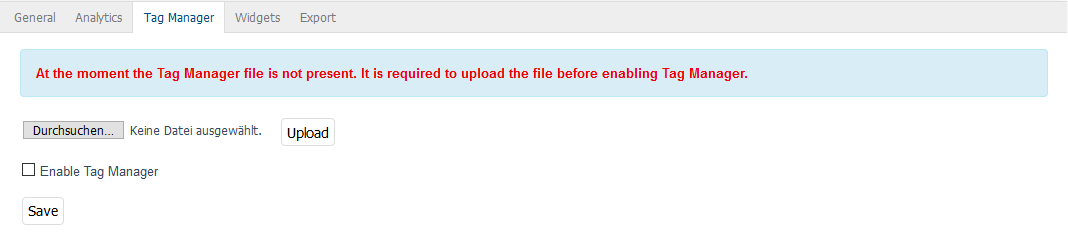
The Tag Manager has been integrated into OXID eShop so that the defined tags are contained in the headers of the individual shop pages and can react to visitor actions. To do this, a Tag Manager file generated by econda must be added to the main shop or the respective subshop. Click on Browse… to select the file on your computer and then click on Upload to transfer it to the selected shop.
Enable the econda Tag Manager.
Widgets tab
Recommendation widgets are configured based on existing templates in the econda Cross Sell Dashboard. Shop owners receive support from econda consultants to successfully implement their requirements for the recommendation and presentation of products.
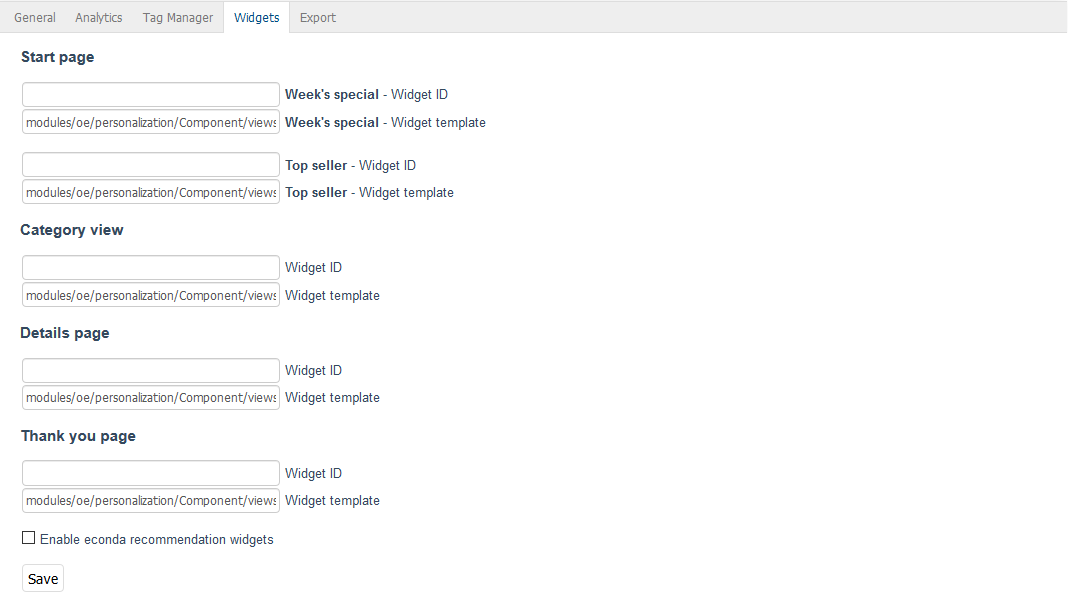
In OXID eShop, econda recommendation widgets are integrated into the start page, the category view, the product details page, and the thank-you page at the end of the ordering process. Recommendation widgets must be enabled in order for these pages to display recommended products.
To access the recommendation service, you will need the IDs of the recommendation widgets configured in econda. Enter them in the Widget ID field of the start page, the category view, the details page, and the thank-you page. The Widget template field contains the relative path to the template that controls the display of the products. The default template is Component/views/list.ejs.html.
Hint
Configuring the recommendation widgets and creating the rules in the econda Cross Sell Dashboard are not part of this documentation. Please contact econda Support if you have any questions.
Export tab
In order to recommend products, econda needs information about your product catalogue. This information is generated by an export that writes the product data into two .csv files. By default, these are stored in the export/oeeconda directory.

Export can be started in the Admin panel or executed outside of the shop as a cron job.
Export in the Admin panel
Export always includes all products of a category. The categories to be included in the export can be defined in the displayed category tree by selecting them with the left mouse button. Hold down the Ctrl or the Shift key to select multiple categories. Press Ctrl+a to select all categories at once.
For products that have variants, you can define whether the variants should also be exported along with the parent product. To do this, check the respective box.
Available stock can also be taken into account when exporting products. Determine how many products must be in stock to be exported.
Export as a cron job
The following command is executed for the export of product data. You can specify your own configuration file containing the export parameters.
vendor/bin/oe-personalization-data-feed --config my-params.php
If it is called without a configuration file, the file source/modules/oe/personalisation/config/default_params.php will be used for export.
vendor/bin/oe-personalization-data-feed
The parameters of a configuration file correspond to the settings that can be defined in the Admin panel for the export of product data. You can use the file default_params.php as a template for your configuration file.