Main tab
The Main tab allows you to create, edit and assign selection lists to the desired products.
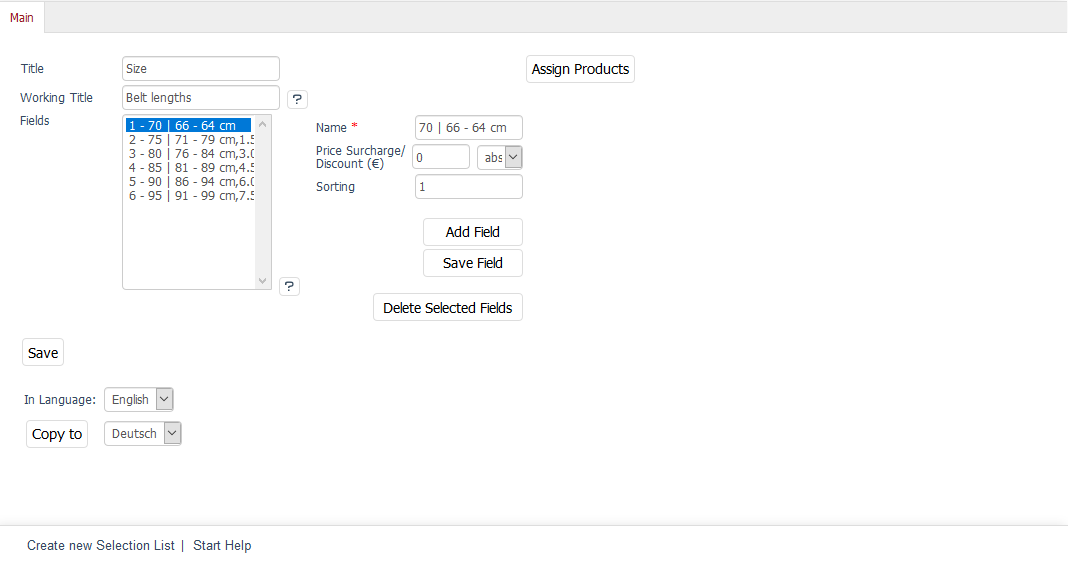
The language selection list at the bottom of the input area allows you to edit information and settings for selection lists in another language directly. Please note that you can only change the language after the selection list has been saved.
- Title
Name of the selection list as displayed on the details page of a product using this selection list. A drop-down list with this title will be displayed above the pricing information on the product’s details page. The selection list contains all the versions defined here as fields.
- Working Title
The working title is not displayed in the shop but serves to better distinguish the selection lists in the Admin panel. For example, if you have created multiple selection lists titled "Size", the working title can help you understand which kind of sizes this is.
- Fields
Fields are used to create the actual version or selection, that is, what the customer can select from the selection list on the product’s details page. If the selection list is used to create variants, the assigned name and the defined surcharge or discount will be the basis of each variant.
- Name
Name of the selection as it appears in the product’s selection list. If the selection list is used to create variants, the name will also be used to select the respective variant.
- Price Surcharge/Discount (€)
Set the surcharge or discount on this version’s price. The price may be absolute or percentage-based. In order for the price to be recalculated depending on the selection and displayed on the details page, you will need to check the Support Price Modifications by Selection Lists box under , in the Perform. tab.
- Sorting
Sorting determines the order in which the version appears in the selection list. The selection with the smallest value will always come first. Sorting starts with the value 1.
- Add Field
Press this button to clear the input fields so that a new field can be created and added to the selection list.
- Save Field
Press this button to save the field entries.
- Delete Selected Fields
Press this button to delete the already created fields after selecting them in the list. Hold down the Ctrl key to select multiple fields.
- Assign Products
Clicking on Assign Products opens a new window where you can assign selection lists to products. All available products will be displayed in the left-hand list. The desired products can be dragged and dropped into the middle list. This shows all products which use this selection list. Hold down the Ctrl key to select multiple products. The right-hand list allows you to change the sorting of selection lists for a product if there are multiple selection lists for this product. Use the small buttons with the arrow icons to move the selected selection list to the desired position. Sorting can affect the order in which the selection lists are arranged on the product’s details page.