Restrict the scope of rights and roles management as needed.
By default, no restrictions are enabled ($this->blUseRightsRoles=3).
Procedure
Open the configuration file config.inc.php.
Configure the $this->blUseRightsRoles parameter.
You have the following options:
0 – Rights management disabled
1 – Backend only
2 – Frontend only
3 – Backend and frontend
Assigning Rights and Roles for the Shop (Frontend)
Assign different permissions for the shop.
Define the permissions in the administration area:
in the article and category management
as well as
under Users ‣ Manage Users ‣ Shop Roles
Important
Principle of Selective Rights Restriction
By default, all visitors to your OXID eShop have full access.
A right is only restricted once at least one role explicitly includes that right, and at least one user group is assigned to that role.
The assigned user group does not have to contain any users. For example, you could create a user group Vollzugriff and assign it to the corresponding role Vollzugriff, in which all rights are activated.
In the first step, all rights are restricted and can then be selectively re-enabled for specific user groups via appropriate roles.
Restricting Visibility of Articles and Categories
Define that only specific user groups are allowed to view certain articles and categories.
Procedure
Under Manage Products, choose the desired article or category.
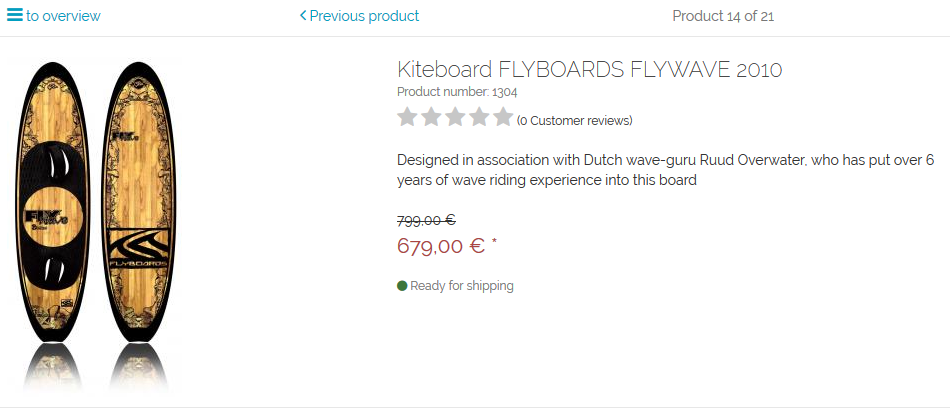
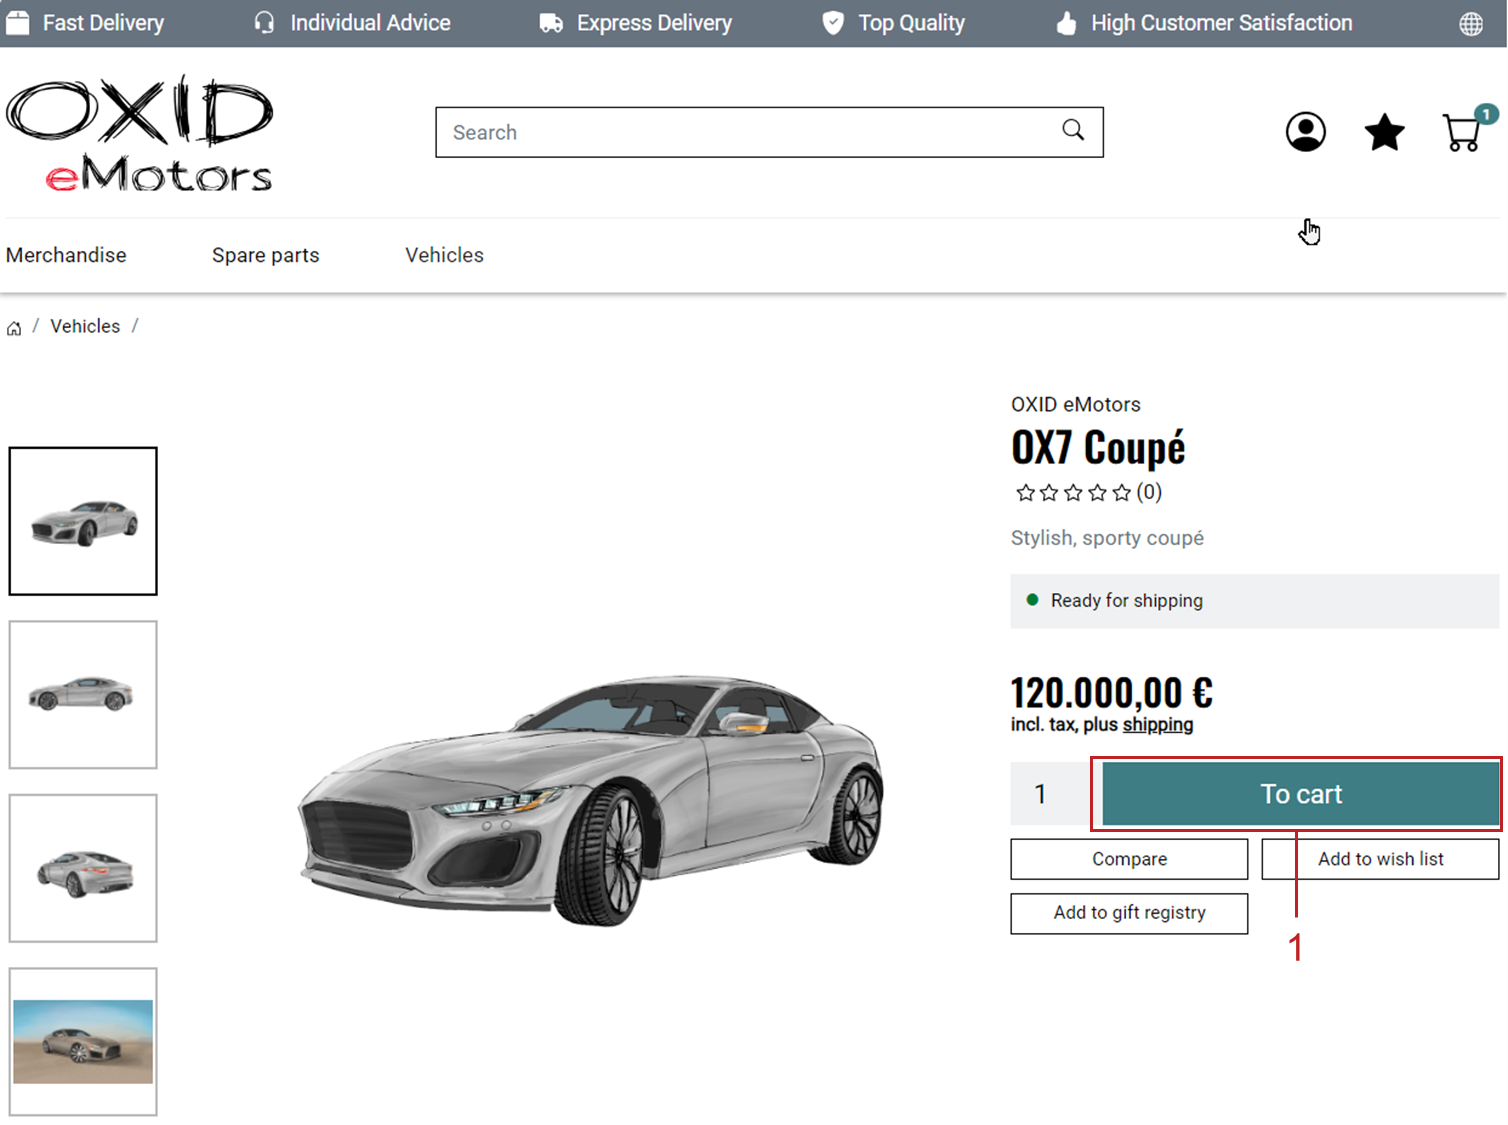
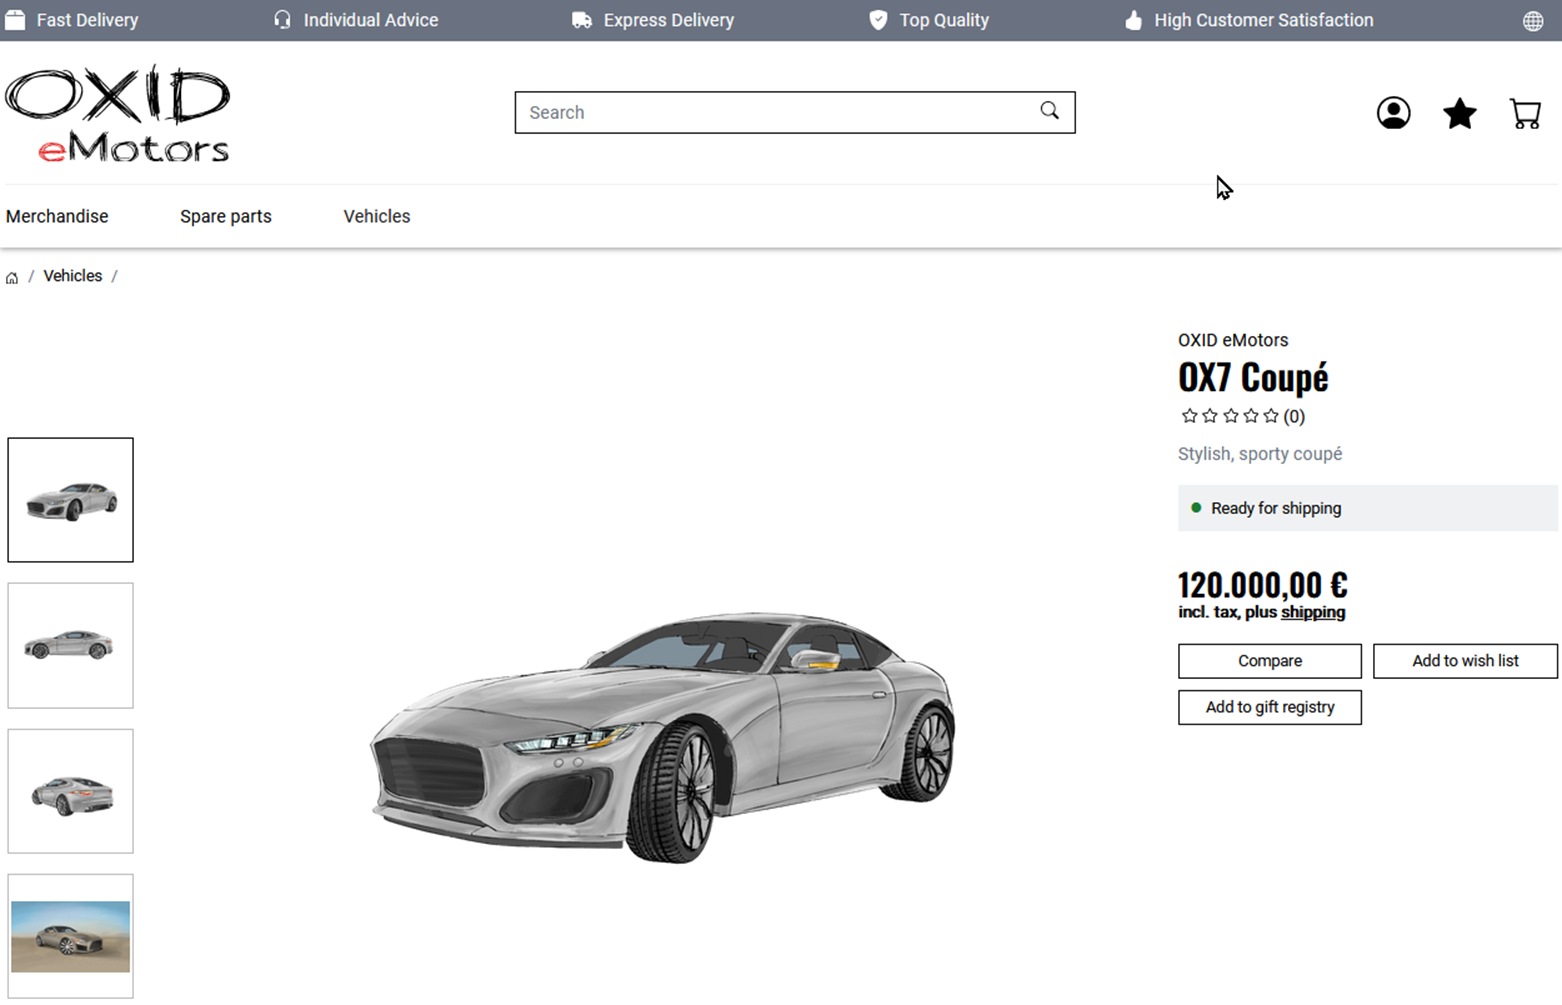
Fig.: Article detail page without add-to-cart button
Controlling Access to Functions and Sections of the Detail Page
Assign rights and roles that apply to the entire product catalog.
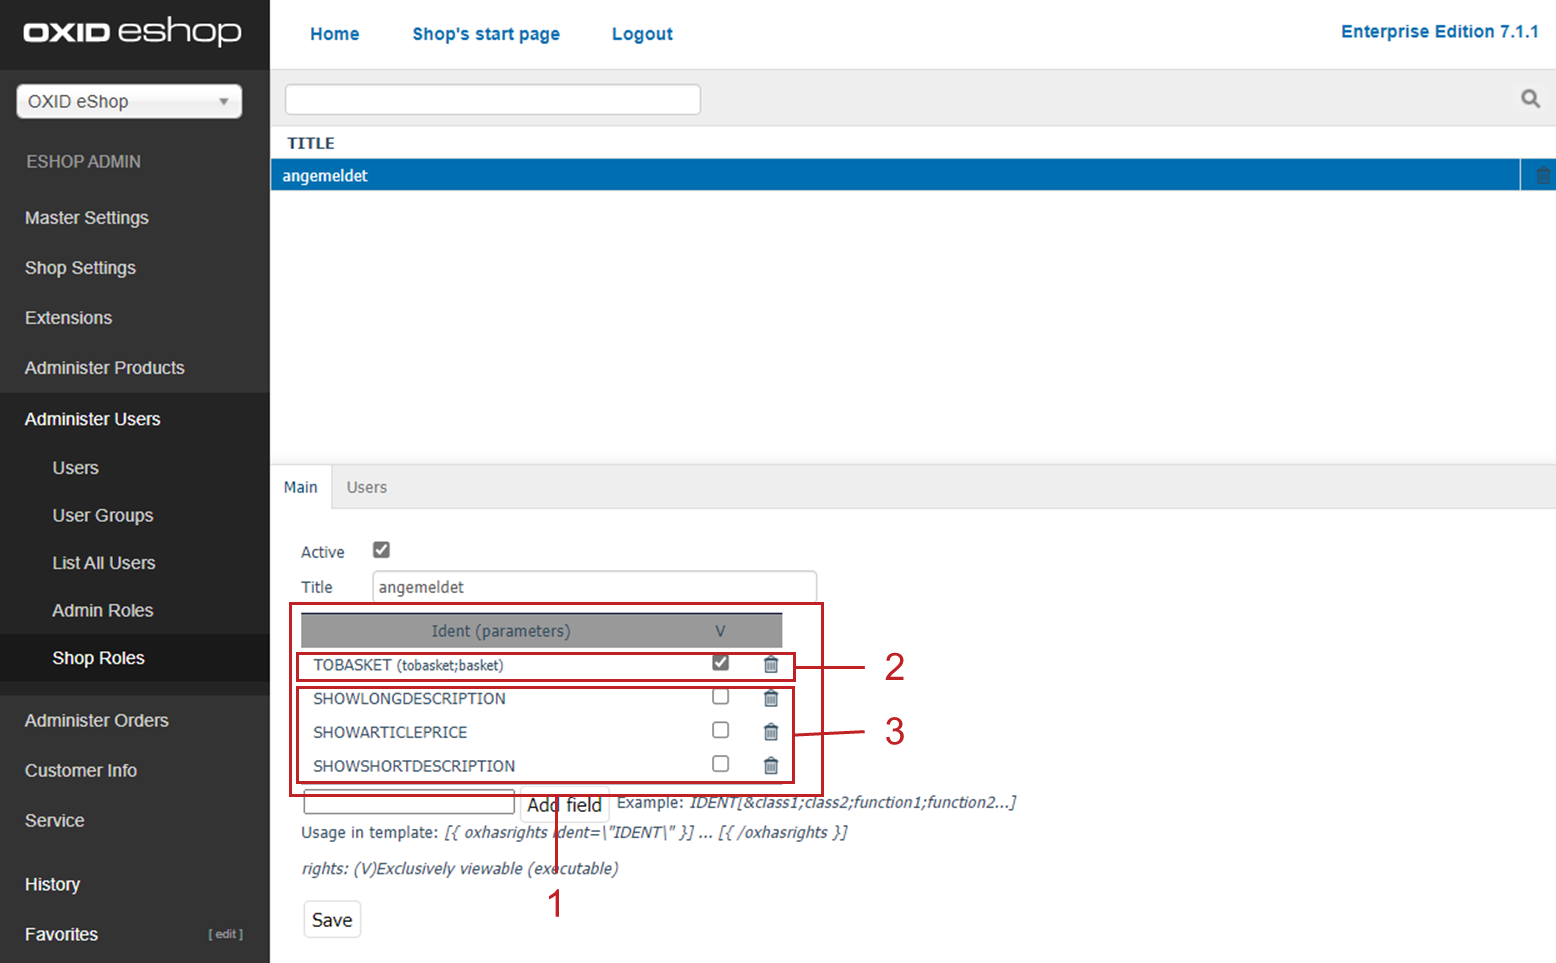
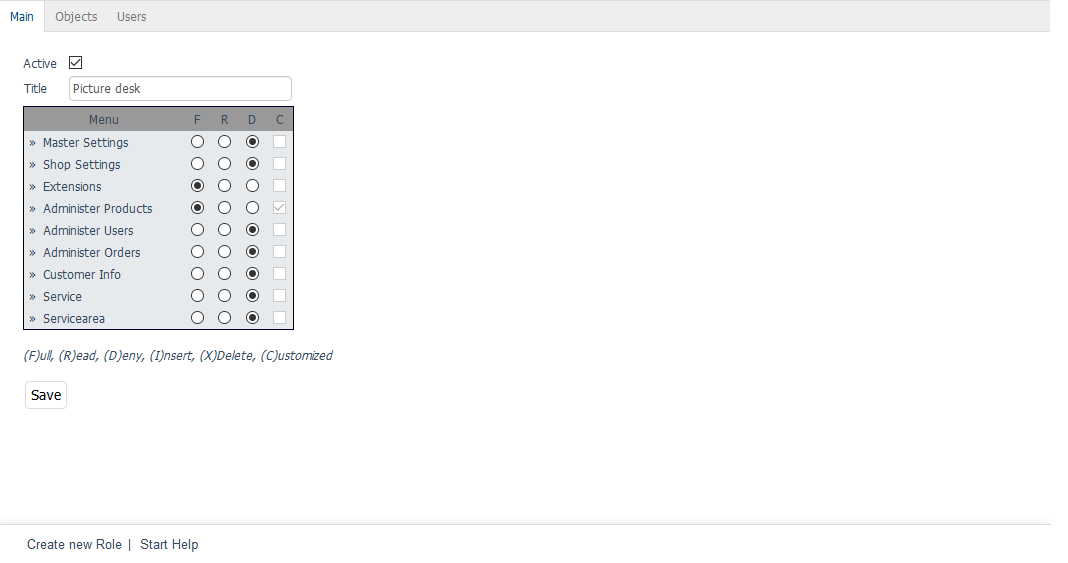
The shop is delivered with the following rights for the frontend, which can be combined into roles and assigned to specific user groups (Fig.: Creating a new role, Pos. 1):
Add articles to the cart (TOBASKET)
Show article price (SHOWARTICLEPRICE)
Show short description of the article (SHOWSHORTDESCRIPTION)
Show long description of the article (SHOWLONGDESCRIPTION)
In this example, you decide to hide the To Cart button for users who are not logged in (“guests”).
Procedure
Create a role that you will later assign to all user groups.
Background: User groups contain users. Users are visitors to your OXID eShop who have an email address and use it to log in.
All other visitors to your OXID eShop are guests. Guests differ from users in that they do not log in.
Choose Users ‣ Manage Users ‣ Shop Roles
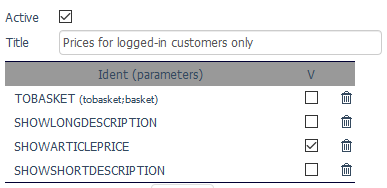
In the Title field, enter the name of the role, for example angemeldet, check Active, and save.
In this example, you want the cart button to be shown to logged-in users, but hidden from guests (non-logged-in users).
Therefore, check the box for TOBASKET (tobasket;basket) (Fig.: Creating a new role, Pos. 2), and save your settings.
The result of this configuration:
The user groups to which the role angemeldet is assigned will have the right TOBASKET. For them, the To Cart button is visible.
For all other user groups, the right TOBASKET is disabled.
General rule: All rights apply by default unless they are restricted.
In this example, the ident parameters that control the long and short descriptions and the price (Fig.: Creating a new role, Pos. 3) are not explicitly assigned to any role, so they apply to all users, including guests.
To apply your settings, assign user groups to the role.
On the Users tab, choose the button Assign user groups.
Fig.: Defining access rules for navigation elements
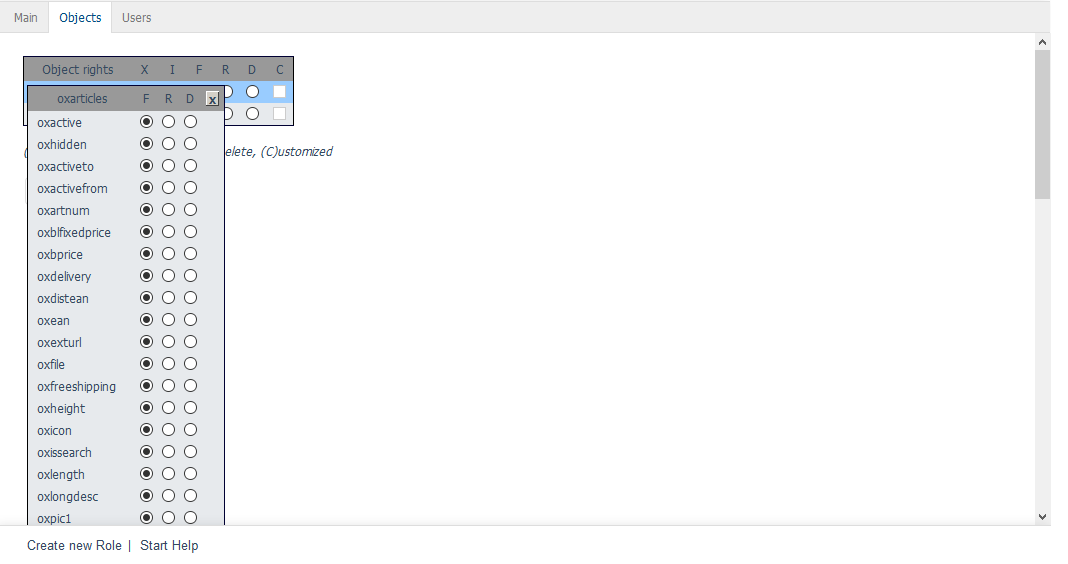
On the Objects tab, define access to categories and products.
For example, control who can create, edit, or delete articles and categories globally, and—if needed—at the level of each individual control (fields, checkboxes, or options) in the input area.