Presenting products by brand
Showcase the brands (manufacturers) of your OXID eShop in the storefront.
This allows you to present products by brand, independently of their category assignment.
How does it look?
In the storefront, your OXID eShop displays all available brands in a brand slider (carousel, brand bar) (Fig.: Brand slider, item 1).
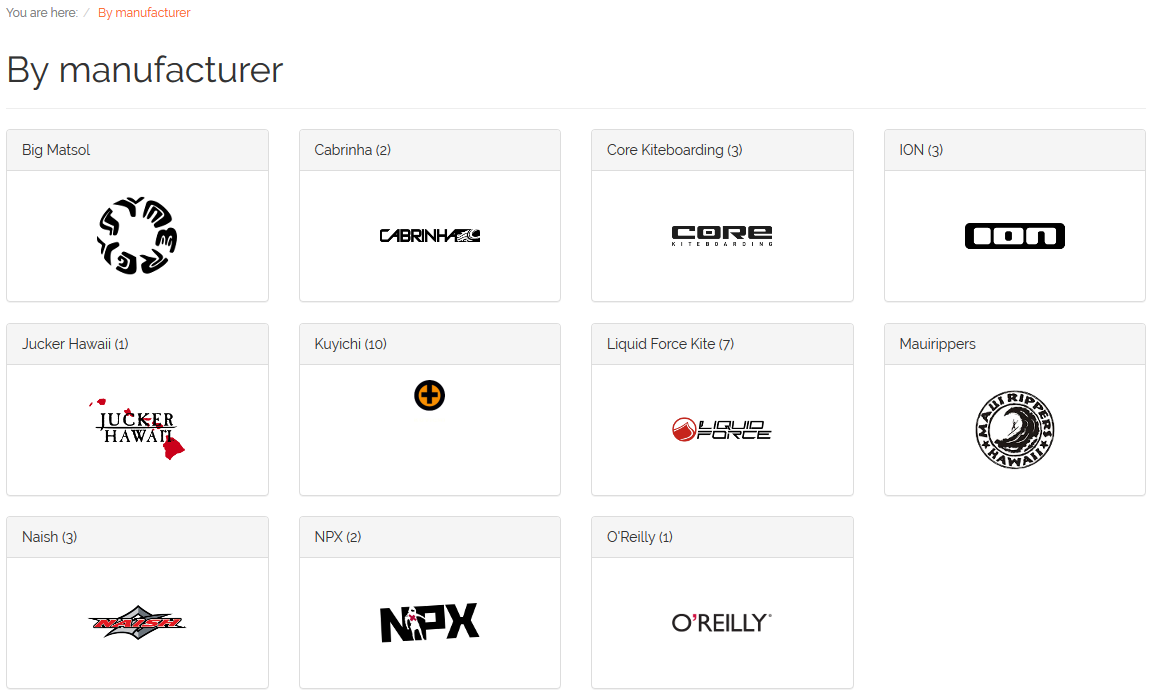
Fig.: Brand slider
By clicking on a brand in the slider (Fig.: Brand slider, item 2), customers are taken to an overview of all products assigned to that brand (Fig.: Product overview by brand, item 1).

Fig.: Product overview by brand
From the product overview of a brand (Fig.: Product overview by brand, item 4), customers can access a full brand directory (Fig.: Brand overview, item 1).
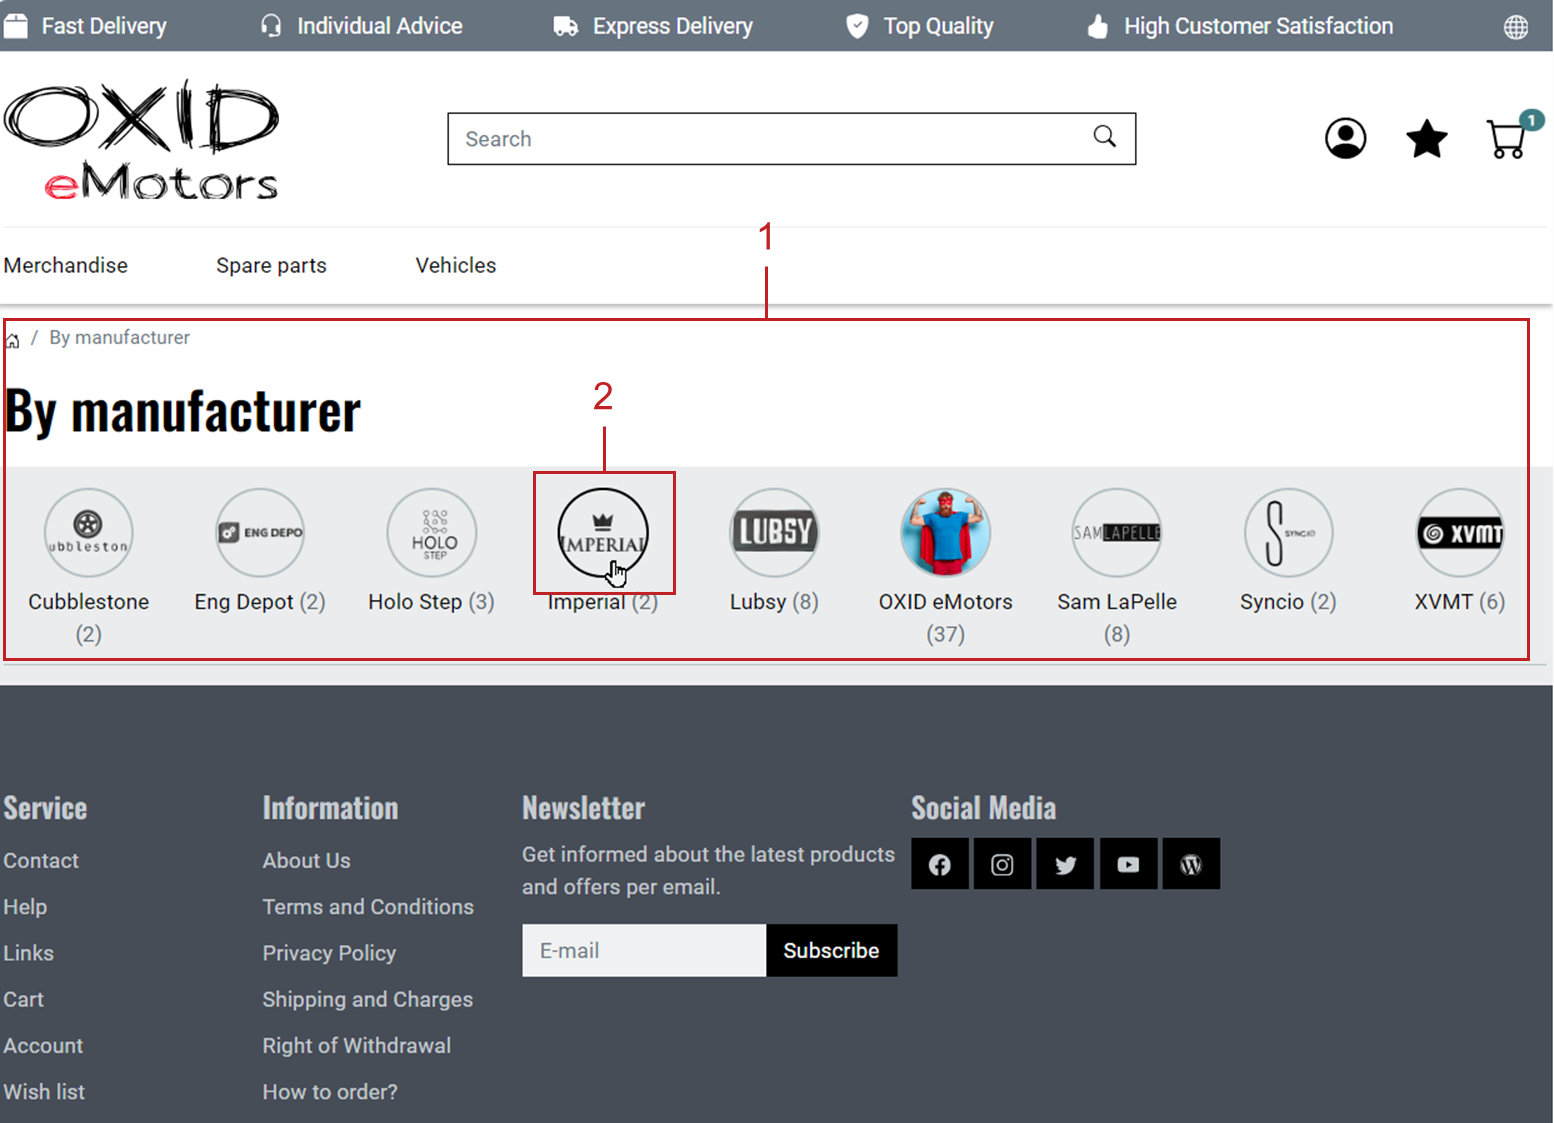
Fig.: Brand overview
Procedure
To display manufacturers as brands in the storefront, follow these steps:
Choose .
Click on Create new Manufacturer.
In the Main tab (Fig.: Creating a brand (manufacturer)):
In the Title field, enter the brand name.
In the Short Description field, enter a tagline. This will appear on the brand’s product overview page (Fig.: Product overview by brand, item 3).
Assign products to this brand.
Ensure the brand is set to active, and save your changes.
Note
Brands are sorted alphabetically by default using the Title field.
Values entered in the Sorting field have no effect unless you override the default behavior.
To change the sort order, you need to implement a custom solution that sorts the
oxManufacturerListbyoxsortinstead ofoxtitle.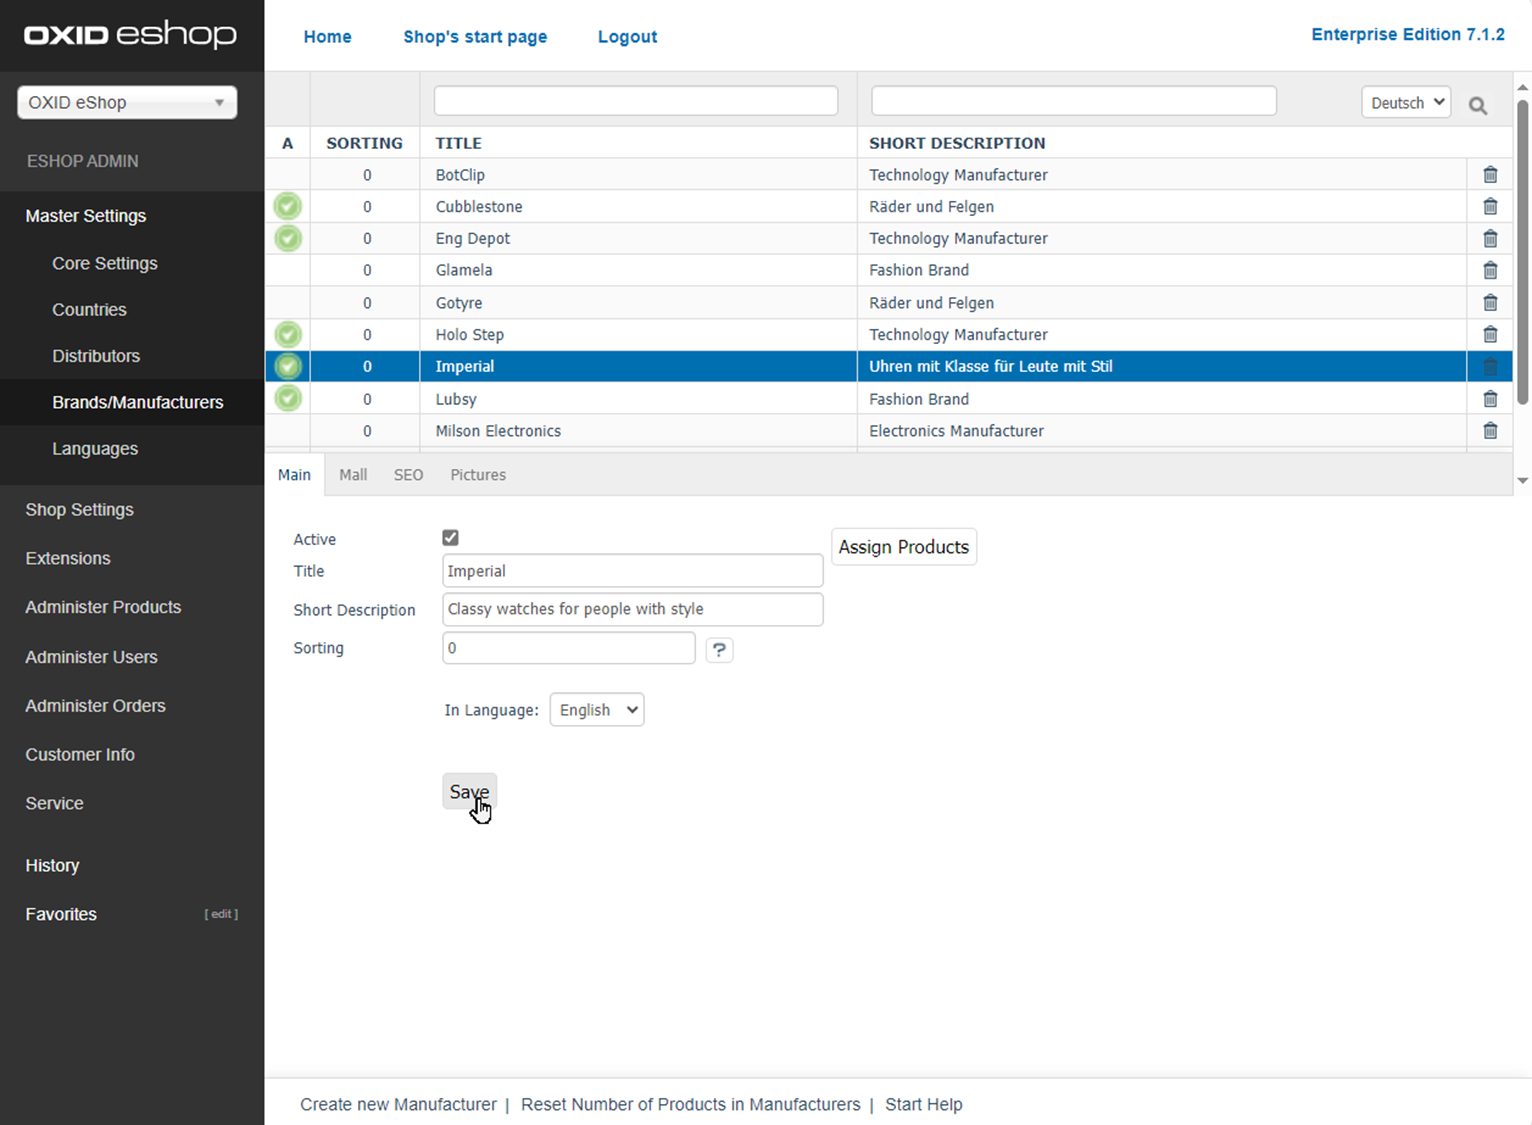
Fig.: Creating a brand (manufacturer)
If you use the OXID eShop Enterprise Edition, use the Mall tab to link the brand to subshops and supershops.
See Mall tab for more information.
Optimize SEO in the SEO tab by adding suitable keywords, meta descriptions, and SEO-friendly URLs.
See SEO tab for more details.
In the Pictures tab, do the following:
Assign a brand icon. This will appear in the brand slider (Fig.: Brand slider, item 1), the brand overview (Fig.: Product overview by brand, item 2), and the product overview (Fig.: Brand overview, item 2).
Set the image size for the brand icon (width × height in pixels) in your theme settings.
Optionally, upload additional images:
Alternative Icon – Use an inverted logo if your theme uses a slider with a dark background.
The following image types are not included in the APEX theme by default. You may use them by extending the theme:
Product image (displayed on the product detail page)
Thumbnail
Promotional icon
Enable brand display in the storefront.
Choose .
Go to the Perform. tab.
Enable the checkbox Load and display Manufacturer List.