Defining the Display Order of Products in Categories
Define the order in which products are displayed within a category.
You can control the display order of products in categories in three different ways:
Automatic sorting – Let the products be sorted automatically based on a selected field, such as title, price, or creation date, in ascending or descending order.
Manual sorting – Arrange products in a specific order manually using the assignment window.
Customer-defined sorting – Specify which sorting options are available to customers in the frontend, such as by price, rating, or article number.
Automatically sorting products
Select a sorting criterion, such as Title, Price, or Date Created, to automatically sort the products.
Define whether the products should be sorted in ascending or descending order based on that field.
Procedure
Choose .
In the category list, select the desired category.
In the Main tab, open the dropdown list Fast sorting.
Select a sorting criterion for the quick sorting.
Choose asc or desc for ascending or descending order.
Save your settings.
Manually sorting products
Arrange the products of a category manually in a specific order.
Procedure
Choose .
Select the desired category from the category list.
In the Main tab, make sure that the Fast sorting option is set to no sorting.
In the Sorting tab, choose the Sort Categories button.
Move the products into the desired order in the right-hand list of the assignment window.
Choose the button Save new sorting.
Result
The left-hand list now shows the current sort order (Fig.: Manually defining the product order, item 1). The Position column displays the values that determine the order.
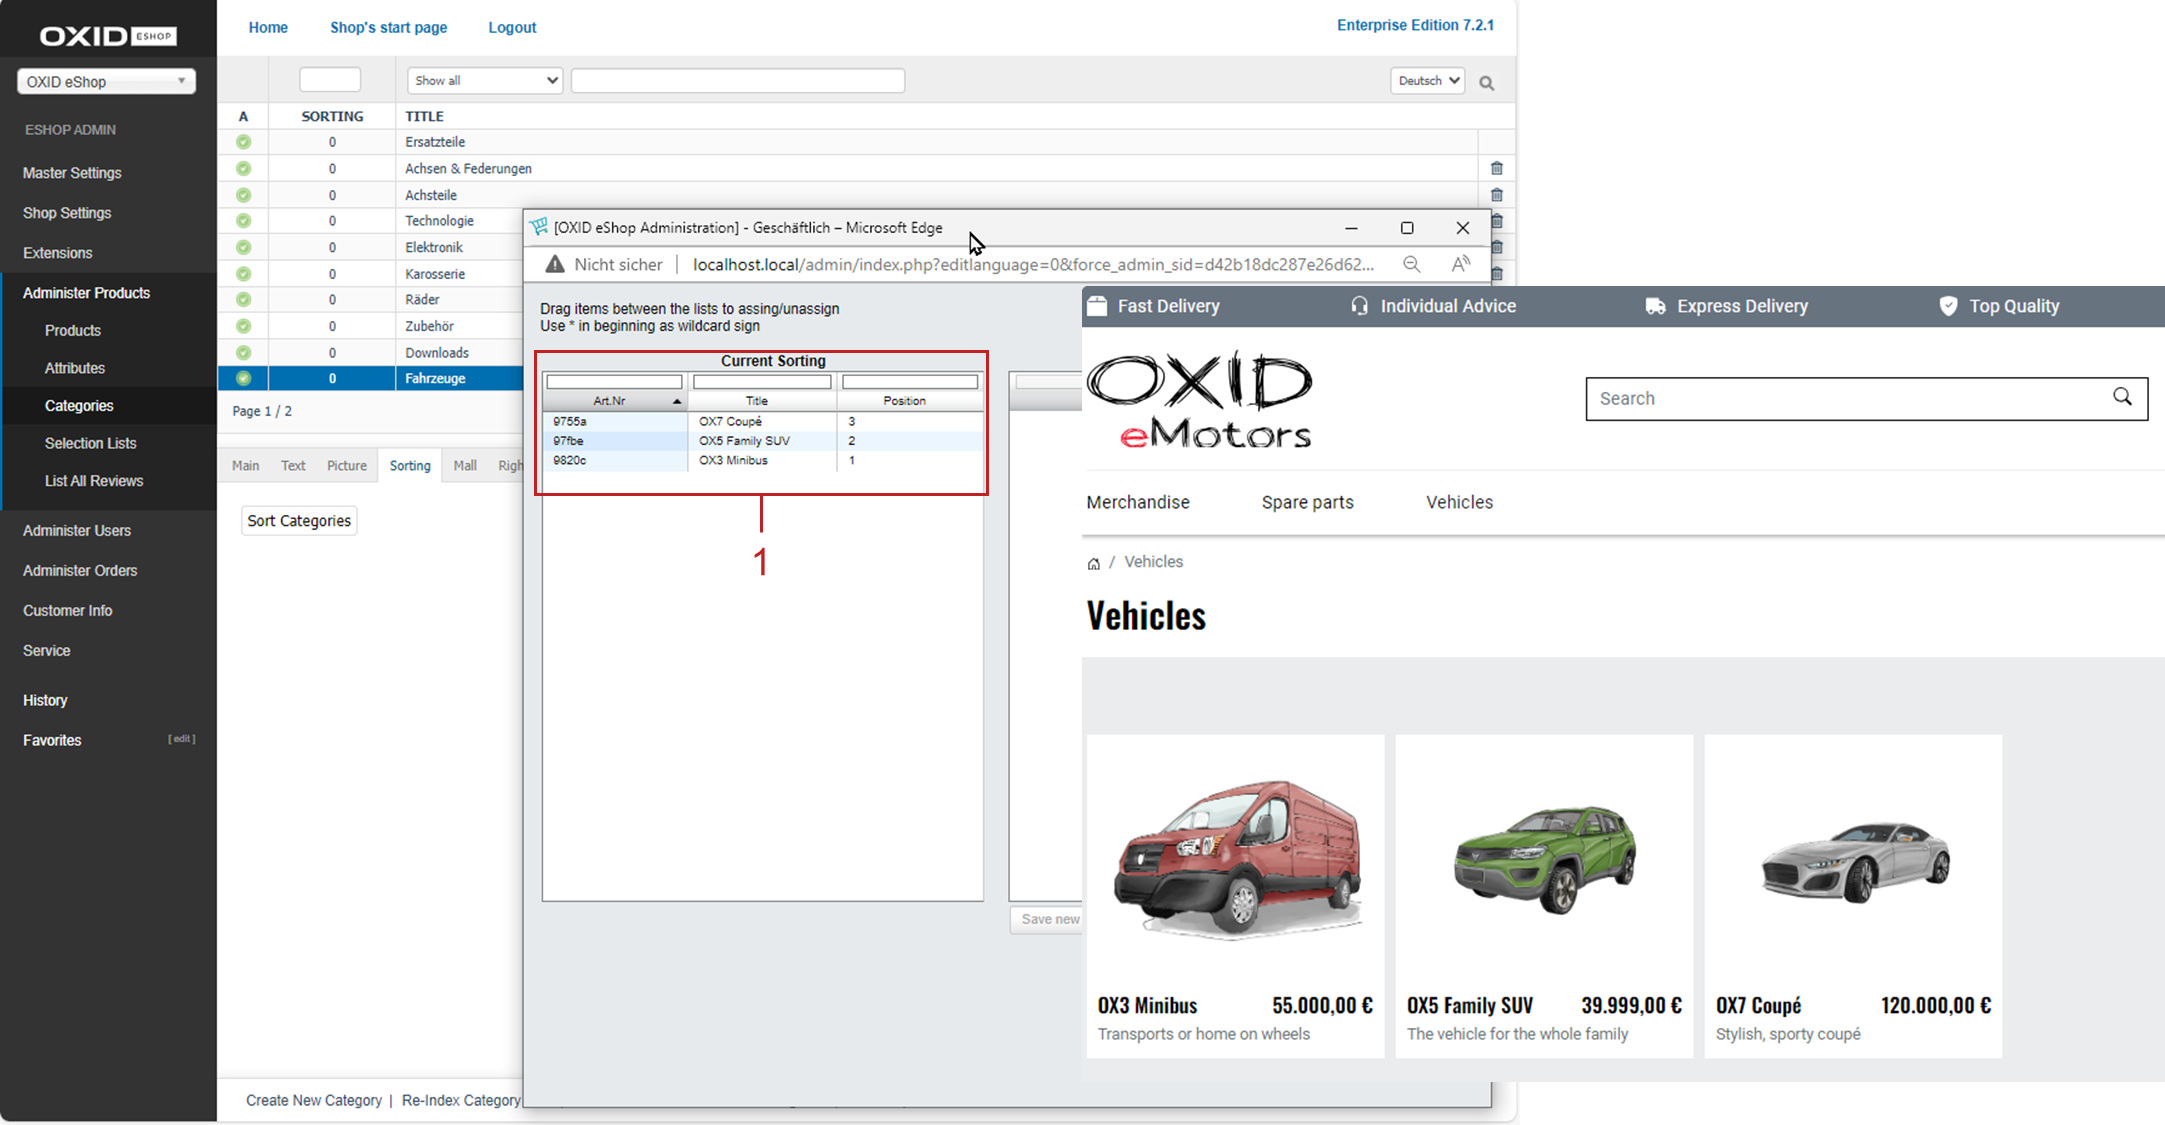
Fig.: Manually defining the product order
Enabling customer-defined sorting
Specify whether and how customers can sort the products within categories.
Procedure
Choose .
In the Settings tab, go to the Products section.
Make sure the Users can sort product lists checkbox is selected (Fig.: Configuring customer-defined sorting, item 1).
Define the fields used for sorting (Fig.: Configuring customer-defined sorting, item 2).
You can use the following options:
oxtitle: Product titleoxprice: Product priceoxvarminprice: Lowest variant price (if variants with different prices are used)oxartnum: Article numberoxrating: Product ratingoxstock: Available stock
Each field must be listed in a separate line.
The sorting fields correspond to the database fields of the table
oxarticles.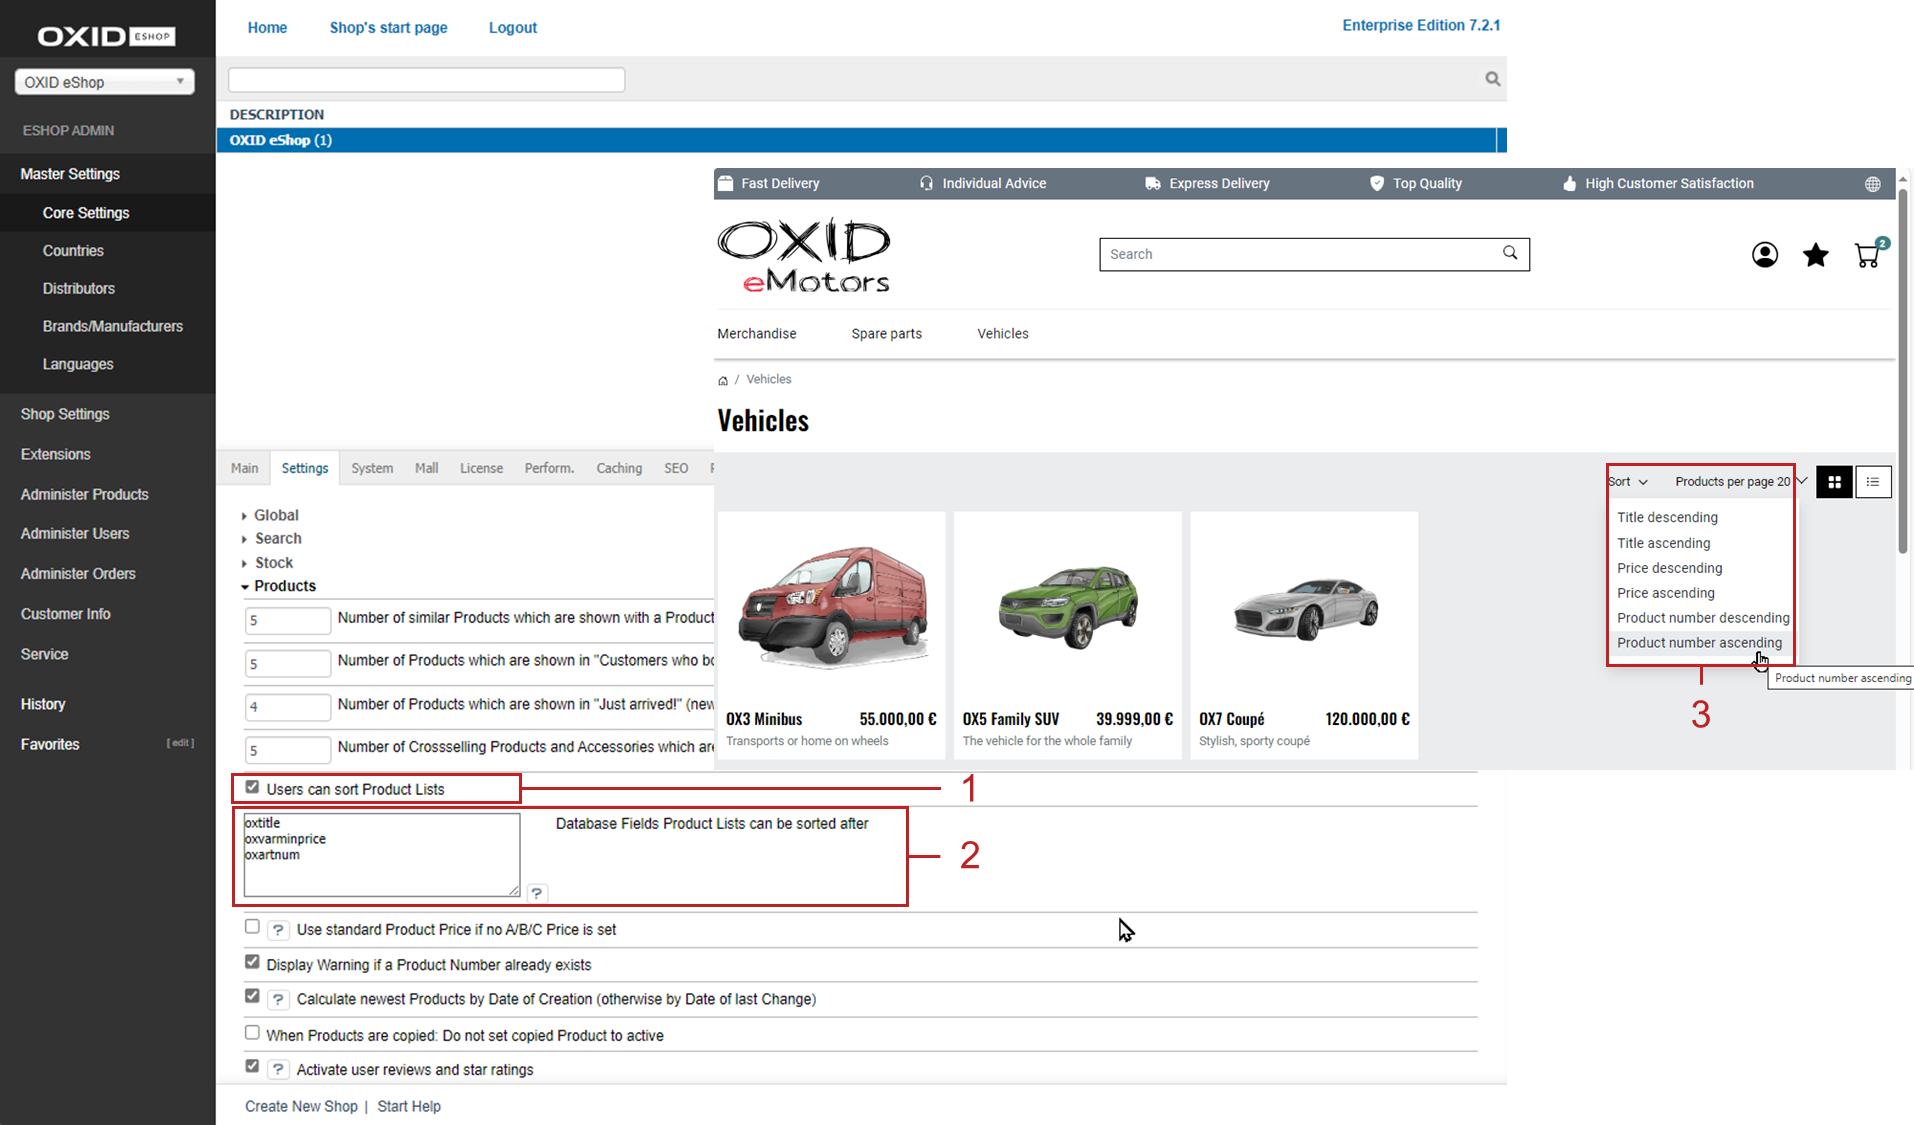
Fig.: Configuring customer-defined sorting
Save your settings.
Result
In our example, customers can now sort products not only by title and price, but also by article number (Fig.: Configuring customer-defined sorting, item 3).
To achieve this, we added the field oxartnum to the default sorting fields oxtitle and oxvarminprice in the core settings (Fig.: Configuring customer-defined sorting, item 2).
See also